Arduino Nano Expansion Board Tutorial. August 30th 2015.

Arduino Nano Expansion Board Other Hardware Development Arduino Forum
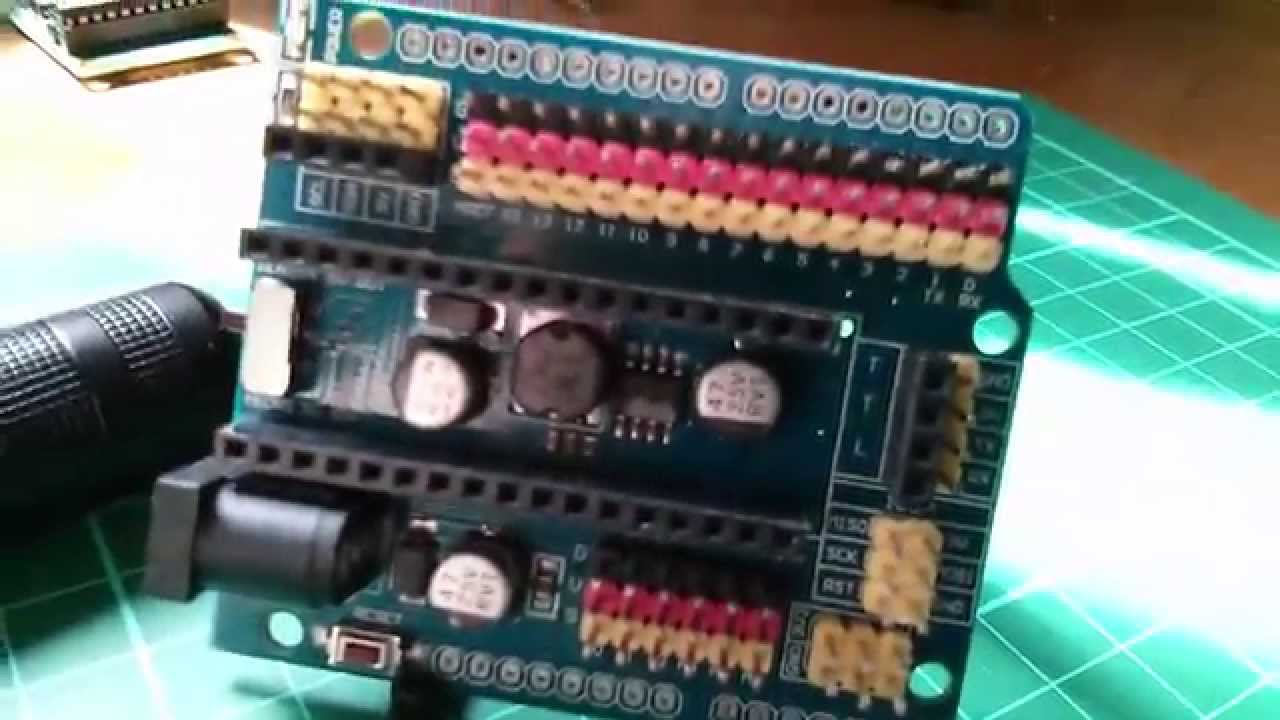
The pins can bent if you do it forcefully so press gently from the middle then gradually press from each side until its completely inserted as shown in the picture.

. It communicates using the original STK500 protocol. Select Arduino Duemilanove or Nano w ATmega328 from the Tools Board menu according to the microcontroller on your board. In this instruction you learn to work on the L293D motor shield.
There are several different options for power input and the footprint of this board is the same as the Arduino Duemilanove. So after mounting the arduino nano we will use this usb cable to program the arduino nano okay. For arduino nano expansion board.
Lead out all digital IO port and analog IO port each one with standard positive and negative power interface. In addition each pinout includes 5V and GND pins for easy connection to sensors or servos. Knowledge required This tutorial assumes that youre familiar with the Arduino IDE and that youre comfortable building Arduino sketches.
It may be a multicolored scattering of smaller drawings or only one heart on the accent of the finger. You can also connect a lcd display by connecting it to the scl sda 5 volt ground in the same module. Notes about using Nano with HC-05 Bluetooth board.
SCL SCK 5V and GND UART expansion pin 4-way header. The expansion board has 3 dip switches to set M0 M2 high or low and on the CNC-shield you can install jumpers. This tutorial should work on most Arm-based Arduino development boards with at least 64K of RAM like the Arduino Nano 33 BLE Sense and the Arduino Portenta H7 Vision shield.
Be gentle when connecting the Arduino Nano compatible board to the breadboard. DC Motor is commonly used in engineering projects. It is a total of three slots can drive three A4988 stepper motor.
L293D shield is a driver board based on L293 IC which can drive 4 DC motors and 2 stepper or Servo motors at the same time. The standard Nano breakout board has that 21mm socket but does. I2C expansion Pin 4-way header.
Each road stepper motors only need two IO. Okay so you dont have to make other circuits for the cascading of the modules okay. 2 Install Grbl Controller.
This article discusses about the technical specs most importantly the pinout and functions of each and every pin in the Arduino Nano board. In the previous post I have discussed about brief introduction of the Arduino UNO and Arduino MEGA there I have discussed about the Arduino UNO board and Arduino MEGA board specifications of the Arduino UNO and Arduino. The Arduino Nano as the name suggests is a compact complete and bread-board friendly microcontroller board.
There are hundreds of shields out there. You can connect a servo. Shields provide hardware only.
If you are using the driver with a breadboard you can just use jumper wires to connect the selector pins to 5 V ie. The Nano 328P Expansion Adapter Breakout Board IO Shield acts as a breakout board for the Arduino Nano microcontroller. Join millions of learners from around the world already learning on Udemy.
For the Nano I found it is necessary to add an external pull down resistor of 1K to the reset pin. Start today and improve your skills. This Nano Mult-Function expansion board is designed especially for Arduino Nano solve the problem of wiring confusing when a variety of sensors connected.
Ad Learn Arduino online at your own pace. How connect Arduino to Internet via Ethernet How to use Arduino with Ethernet shield. You can wire the HC-05 Bluetooth board to auto-reset the Nano by connecting the State pin to RST through a 01 uF capacitor which works on other Arduino models such as the Pro Mini and Pro Micro.
How to Use Arduino NANO Expansion Adapter Breakout Board IO Shield Part -1. Arduino Shields also called expansion boards are boards that can be stacked on top of the Arduino board to provide specific functionalities. This Nano Mult-Function expansion board is designed specially for Arduino Nano solve the problem of wiring confusing when a variety of sensors connected.
CNC Shield V4 Expansion Board For Arduino Nano Description. This expansion board as a driver expansion board can be used for engraving machines 3D printersor CNC. Lead out the I2C interface of mainboard for convenient connection.
Additional pads for Arduino UNO form factor. One thing the Arduino Nano lacks is a 21mm power socket for supply voltages higher than 5v. Each channel of this module has the maximum current of 12A and doesnt work if the voltage is more than 25v or less than 45v.
The detail instruction code wiring diagram video tutorial line-by-line code explanation are provided to help you quickly get started with Arduino. The ATmega328 on the Arduino Nano comes preburned with a bootloader that allows you to upload new code to it without the use of an external hardware programmer. Okay now mount it Music okay.
This tutorial we will learn about controlling of DC Motor with Arduino Nano board in Proteus ISIS. Lead out the I2C interface of mainboard for convenient connection. RX TX 5V and GND More 5V and GND pins for sensor Servo.
The nano mount the arduino nano like this by giving the direction of the uh usb cable input to the this side. Also make sure the. Here you can see that three wires are output from the servo motor which are the yellow one.
The unit comes fully assembled. Arduino Shields can be categorized into two types. Otw_is sidebarotw-sidebar-1 In this projectiot123 tutorial I will discuss about the detailed introduction of Arduino NANO for Beginners.
So this is much helpful. The Computer-Aided Design CAD files and all associated content posted to this website are created uploaded managed and. Arduino nano expansion board tutorial At times you would like an primary and at the same time an easy nail designThe optimum solution is the designs with the nails with hearts.
Open Arduino IDE choose File-Examples-grblmain-GRBLtoArduino youll open a grbl sample program select the port and board type burn this grbl sample program to Arduino NANO. On board additional 33V voltage regulator to supply more 33V. It is normally used to control the speed and rotating electrical energy into mechanical energy.
The Nano board weighs around 7 grams with dimensions of 45 cms to 18 cms L to B. Lead-out all digital IO port and analog IO port each one with standard positive and negative power interface. Place the grblmain folder to libraries in Arduino IDE installation directory.
Shields provide hardware controller. I often use a CNC-shield or expansion board in combination with these drivers. 8 Analog Pins Arduino NANO have 2 additional Analog input pin 14 Digital IO pins include 6 PWMs AREF pin too.

Nano Io Expansion Sensor Shield Module Uno R3 V3 0 I O For Arduino Jakartanotebook Com
Arduino Nano Tutorial Breakout Board With 2a Smps 1 Youtube

How To Use Arduino Nano Expansion Adapter Breakout Board I O Shield Part 1 Youtube

Arduino Nano Vs Arduino Uno Arduino Nano I2c Lcd 16x2 Youtube

Arduino Nano I O Expansion Shield Thinkrobotics In

Arduino Nano Io Shield Extension Ichibot Store

Nano Io Expansion Sensor Shield Module Uno R3 V3 0 I O For Arduino Jakartanotebook Com
Arduino Nano I O Expansion Board Project With Oled And Dht22 Sensor Youtube
0 komentar
Posting Komentar